
Oracle RAC 12.2 Installation Using Virtualbox
- Sudipta Bhaskar

- Jul 11, 2020
- 5 min read
This post will give detailed step by step process to install Oracle RAC 12.2 on Oracle Linux 7 using virtualbox.
1. Software Requirement
· Oracle Virtualbox
· Oracle Linux 7
· Oracle 12c Release 2 Software 64 bit
2. Virtualbox Network Setup
The main important thing is to setup network in virtualbox.
In this step we will be creating a host only network.
· Start Virtualbox from the menu.
· Click on File->Host Network Manager

Click on Create

Click on Apply.
Restart Laptop to make the changes take effect.
3. Oracle Linux 7 Installation
Start Virtualbox and click on new.

Click Next and Give the desired memory size.

Create Next and Create a Virtual Hard Drive with Dynamically Allocated


Following page will appear next. Click on Settings.


Follow the following Steps as depicted.


Click Ok and Following Page will appear.

Start the Machine by Pressing the Green Arrow. Following Screen will appear. Follow the following steps.


Click on Begin Installation

· Set root password and create user if required.
· Login screen will appear after reboot. Login using root.

·We need to modify the network part now


Restart network Service
Systemctl restart network.service

4. Clone and Create 2nd Node
Shutdown Node1 and follow the following steps to clone.


Next Screen is this

Start the machine.

Change the hostname using nmtui


We need to Modify the Networks now
cd /etc/sysconfig/network-scripts/
vi ifcfg-enp0s8
Change the ip under IPADDR
• Execute the following commands
• yum update -y
• yum install oracle-database-server-12cR2-preinstall
• yum install oracleasm*
• yum install kmod-oracleasm*
Configure DNS Server
Create a new VM now for DNS Server


• Install bind packages
yum install bind bind-utils
• Following configurations changes needs to be done in DNS Server
❖ Modify /etc/hosts with the following details
# Public
192.168.126.10 node1.localdomain node1
192.168.126.20 node2.localdomain node2
# Private
192.168.100.10 node1-priv.localdomain node1-priv
192.168.100.20 node2-priv.localdomain node2-priv
# Virtual
192.168.126.30 node1-vip.localdomain node1-vip
192.168.126.40 node2-vip.localdomain node2-vip
# SCAN
#192.168.126.50 scan.localdomain scan
#192.168.126.60 scan.localdomain scan
#192.168.126.70 scan.localdomain scan
❖ Create file /var/named/localdomain.zone with the following details
$TTL 86400
@ IN SOA localdomain root.localdomain (
42 ; serial (d. adams)
3H ; refresh
15M ; retry
1W ; expiry
1D ) ; minimum
IN NS localhost
localhost IN A 127.0.0.1
node1 IN A 192.168.126.10
node2 IN A 192.168.126.20
node1-priv IN A 192.168.100.10
node2-priv IN A 192.168.100.20
node1-vip IN A 192.168.126.30
node2-vip IN A 192.168.126.40
scan IN A 192.168.126.50
scan IN A 192.168.126.60
scan IN A 192.168.126.70
❖ Create Another file named 126.168.192.in-addr.arpa
File naming convention should be First three part of Public IP in reverse order then .in-addr.arpa
$ORIGIN 126.168.192.in-addr.arpa.
$TTL 1H
@ IN SOA DNServer.localdomain. root.DNServer.localdomain. ( 2
3H
1H
1W
1H )
126.168.192.in-addr.arpa. IN NS DNServer.localdomain.
10 IN PTR node1.localdomain.
20 IN PTR node2.localdomain.
30 IN PTR node1-vip.localdomain.
40 IN PTR node2-vip.localdomain.
50 IN PTR scan.localdomain.
60 IN PTR scan.localdomain.
70 IN PTR scan.localdomain.
❖ Now we need to modify /etc/named.conf file
options {
listen-on port 53 { 127.0.0.1; 192.168.0.102; };
listen-on-v6 port 53 { ::1; };
directory "/var/named";
dump-file "/var/named/data/cache_dump.db";
statistics-file "/var/named/data/named_stats.txt";
memstatistics-file "/var/named/data/named_mem_stats.txt";
recursing-file "/var/named/data/named.recursing";
secroots-file "/var/named/data/named.secroots";
allow-query { localhost; 192.168.0.0/24; 192.168.126.0/24;};
/*
- If you are building an AUTHORITATIVE DNS server, do NOT enable recursion.
- If you are building a RECURSIVE (caching) DNS server, you need to enable
recursion.
- If your recursive DNS server has a public IP address, you MUST enable access
control to limit queries to your legitimate users. Failing to do so will
cause your server to become part of large scale DNS amplification
attacks. Implementing BCP38 within your network would greatly
reduce such attack surface
*/
recursion yes;
dnssec-enable yes;
dnssec-validation yes;
/* Path to ISC DLV key */
bindkeys-file "/etc/named.root.key";
managed-keys-directory "/var/named/dynamic";
pid-file "/run/named/named.pid";
session-keyfile "/run/named/session.key";
};
logging {
channel default_debug {
file "data/named.run";
severity dynamic;
};
};
zone "." IN {
type hint;
file "named.ca";
};
zone "localdomain." IN {
type master;
file "localdomain.zone";
allow-update { none; };
};
zone "126.168.192.in-addr.arpa." IN {
type master;
file "126.168.192.in-addr.arpa";
allow-update { none; };
};
❖ Insert the following line in the /etc/resolv.conf file
nameserver 192.168.0.102
❖ Run the following command to restart and enable dns service
systemctl stop named.service
systemctl start named.service
systemctl enable named.service
❖ Remember to stop the firewall and disable it else the nodes will not be able to access it.
systemctl status firewalld
systemctl stop firewalld
systemctl disable firewalld
❖ Modify SELINUX=disabled in /etc/selinux/config
Changes to be done in RAC Nodes to use the DNS Service
❖ In this example we have taken NAT as the first network. So the /etc/resolv.conf file will look like following.
# Generated by NetworkManager
search localdomain
nameserver 202.83.21.12
nameserver 202.83.21.25
Add the following line to it.
nameserver 192.168.126.102
After saving the file do the following to disable any edit on the file after reboot.
chattr +i /etc/resolv.conf
Do the above steps in both the nodes.
Configure ASM
1. Stop the running VMs.
2. Click on “Virtual Media Manager”

3. Following Screen will appear.

4. Click on Create.

Click on Next.
5. Click on Fixed Size.

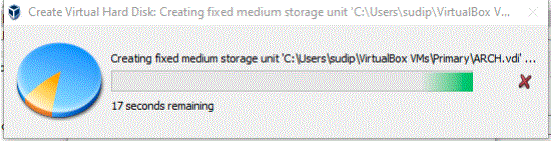
6. Give it the name DATA.vdi or any name of your choice. This disk will be used for DATA diskgroup

7. Disk will create like this

8. Make the disk shareable. Click on Type Dropdown, select shareable and click on apply.

9. Same way create another disk with the name ARCH of size 12G.


10. Same way Create another disk by the name VOTE.


11. Add the disks to the servers


In the same way add the disks to the second node also.
12. Start the VMs one by one.

13. Login to Node1 through putty as root
Run the following commands to update the packages.
yum update -y
yum install oracle-database-server-12cR2-preinstall
yum install oracleasmlib-2.0.12-1.el7.x86_64.rpm
yum install oracleasm-support-2.1.11-2.el7.x86_64
yum install kmod-oracleasm-2.0.8-27.0.1.el7.x86_64
Run the same commands in node2 as well.
14. Now we need to partition the added disks. This needs to be done only in one node.
lsblk output looks like this

We can see that sdb, sdc, sdd disks don’t have partitions. We need to create partitions now.


Now lsblk command output will be like this.

From root user we need to configure asm


Now let us create the ASM disks

Scan the disks and list those

Download and Install Grid
• Download linuxx64_12201_database.zip and linuxx64_12201_grid_home.zip files.
• Change oracle user’s password.
• Create the following structure
mkdir -p /oracle/app/oracle/12.2/grid
chown -R oracle:dba /oracle/app/oracle/12.2/grid
• Transfer database and grid binary. Grid binary is needed only on first node.
Here I am transferring using git bash shell.
scp linuxx64_12201_database.zip oracle@192.168.126.10:/home/oracle
scp linuxx64_12201_grid_home.zip oracle@192.168.126.10:/oracle/app/oracle/12.2/grid
scp linuxx64_12201_database.zip oracle@192.168.126.20:/home/oracle
• We need to run the following from the first node to do the prechecks before installing grid software.
./runcluvfy.sh stage -pre crsinst -n node1,node2 -fixup -verbose
Check the results, if there are any problems we need to fix those before installation.
• We need to do the installation using Mobaxterm Personal Edition for GUI

• Click on Session, following screen will appear

• Click on SSH to connect to server

• Unzip the grid binary. Grid binary needs to be unzipped where we want the grid home to be.
cd /oracle/app/oracle/12.2/grid/
unzip linuxx64_12201_grid_home.zip
./gridSetup.sh
After this step Grid installation GUI will appear.


• Click on Add to add another node


• Click on SSH Connectivity.

• Click on Setup

• Click on Test

• Click on Next


Click on Change Discovery Path


Select the Vote disk and Click on Next


It will prompt to run the scripts from root user. Run it in both the nodes one by one.

After running the script from both the nodes click on OK

In Last step “Cluster Verification Utility Failed” Message will come. We need to skip it.

Now the installer is complete, Close the installer. Grid Installation is complete.
Install Oracle Database Software
• Unzip Database software

• Login using oracle in mobaxterm software.

• Follow the next installation steps one by one.


Click on Ignore All


Create ASM diskgroup using asmca utility. Use Mobaxterm for this.


Click on Diskgroups


Click on Create.


Now this will be the final look. Click on Exit.

Create Database using DBCA
Use MobaXterm for GUI


Comments